Cascade is a range of cast iron effect guttering and downpipe profiles which provides authentic traditional cast iron style in plastic. A unique patented manufacturing process combines with authentic cast iron architectural detailing on pipe work, fittings and hoppers to give the full appearance of cast iron with all the benefits of modern plastic materials. Installation Guide Available Here
In addition to Classic Black, Cascade is available in a choice of heritage colours including Anthracite Grey, Oxford Blue, Olive Green, Graphite Grey, Sandstone and Porcelain White.
The Features and Benefits Include:
- Extensive choice of gutter and pipework profiles
- Complementary push-fit soil system
- Range of traditional hopper designs
- Matching Gothic water butt and stand
- Quick and easy to install even for an inexperienced installer
- Lightweight yet robust
- Fully UV stablilised, durable and corrosion resistant
- 10 year warranty
- Affordable an alternative to cast iron
- Comes ready to fit
- Durable and corrosion resistant
What types of Guttering are available in Cascade Cast Effect?
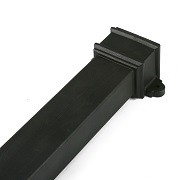
- 112mm Half Round (Roundstyle) Gutter
- 106mm Prostyle Ogee Gutter
- 115mm Deepflow (Deepstyle) Gutter
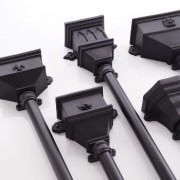
- 68mm Round Downpipes and Fittings
- 65mm Square Downpipes and Fittings
- Hoppers and Planters
- 170mm Deepstyle Industrial Gutter
- 105mm Round Downpipes and Fittings
- 100mm x 75mm (4 Inch x 3 Inch) Rectangular Downpipes and Fittings
Can plastic, Cast Iron Style guttering join cast iron guttering?
Yes. Plastic, cast iron effect guttering can be joined to cast iron guttering easily with the help of the right adaptor.
What colours are available in the Cast Effect Cast Iron Style Range?
- Classic Black (the most popular choice)
- Graphite Grey (GY)
- Oxford Blue (BU)
- Olive Green (GN)
- Sandstone (SD)
- Anthracite Grey (AG)
- Porcelain White (WH)
- Chartwell Green (CG)
Cascade Cast Iron Style Plastic Gutter Installation Guide
The Brett Martin Cascade Cast Effect Gutter Systems are specially coated versions of the existing range and therefore follow the usual installation proceedures of standard PVCu Gutter Systems. These can be found in full in our Installation Help Section but the basic details are as follows:
- Position the Cast Effect Gutter Outlet vertically above the drain inlet or gully from which the rainwater wil be conveyed to the underground drainage system.The Cast Effect Outlet should then be fixed in position on tthe fascia allowing for a fall if one is required.
- The next step is to fix a Cast Effect Fascia Bracket (Gutter Support Bracket) furthest from the Outlet at a position on the fascia which will produce a run of gutter either horizontal / level or to the desired fall.
- Then stretch a line taut between the fixed outlet and the fascia bracket, establishing a straight gutter line.
- Fix the remaining gutter fittings to the fascia following this line, gutter union brackets being positioned at each junction of two gutter sections.
- Where there is no fascia, Rise and Fall Brackets and Rafter Brackets provide alternative solutions.

How far should Fascia Brackets / Gutter Supports be spaced?
Cascade Cast Iron Style Fascia Brackets and other supports (Outlets / Unions / etc) should normally NOT EXCEED 900mm. Roofs with a pitch exceeding 35 degrees and / or with SMOOTH SUFACES and / or are subject to HEAVY SNOW LOADING, support should not exceed 600mm. Gutter angles incorporate fixing positions which can be used for fixing to the fascia board, adjacent support brackets should be no more thn 900mm away. If they are not fixed then brackets should be no more than 150mm away.
Cascade Cast Iron Style Downpipe Installation Guide
Cast Iron Style Downpipes are specially coated to provide the 'cast' effect that can't be obtained through the normal extrusion process, and although they are strong and resilient, as with any such plastic downpipe, they can become distorted if stored or transported without care or adequate support. To eliminate anything affecting the Downpipe Systems appearance, Brett Martin recommends that intermediate pipe clips are used to ensure that pipe alignment is maintained, especially on uneven brickwork.
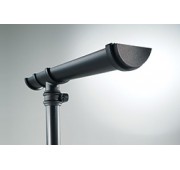
Cast Iron Effect Downpipe Installation Guide Step 1Using a plumbline from the centre of the Cast Iron Style Outlet or Offset Spigot, determine the position of the pipework to ensure a vertical alignment to th underground drainage system. For an authentic look it is recommended that a shoe (
BR216LCI) is used to discharge the rainwater into the underground drainage system.
 Cast Iron Effect Downpipe Installation Guide Step 2
The Socket of the Downpipe is offered up to the gutter outlet, or relevant offset spigot, and positioned in line with the plumbline. It is advised that the wall be lightly marked at intervals to ensure correct alignment with the plumbline throughout the length of the installation.
Cast Iron Effect Downpipe Installation Guide Step 3Mark the wall, using the holes in the downpipe socket lugs as guides, then drill, plug and fix the pipe, using the appropriate fixing pack (
BRFP55CI or
BRFP75CI), which contains 10 screws, plugs and washers.
Cast Iron Effect Downpipe Installation Guide Step 4Repeat until the last full downpipe length is fixed, ensuring that each pipe socket is pushed fully onto the receiving pipe, and then retracted 5mm before the socket is fixed to th wall. This is especially important during cold weather installations and a requirement in the installation of all plastic pipework.
Cast Iron Effect Downpipe Installation Guide Step 5The lowest length of pipe is then cut to length to allow the shoe to be positioned directly above the underground drainage connection.
It is recommended that intermediate pipe clips are used where uneven brickwork is encountered to help maintain alignment.
Expansion Allowance
It is essential that there is sufficent allowance to accommodate any expansion that may take place in the pipework system, especially when installing during cold weather. Therefore, please ensure that for 68mm and 65mm Cast Effect Downpipes Ranges, pipes are marked and withdrawn 5mm from the lower socket before fixing. For the 105mm Cast Effect Downpipe Range this needs to be 10mm and for the 100mm x 75mm Rectangular Downpipe Range it needs to be 20mm. If Coloured Systems are being installed all downpipe styles require a 20mm expansion. If the Cast Effect Downpipes are being installed in very hot weather these allowances for expansion should be halved.
How do I allow for expansion with the Cast Effect Downpipe Range?
Simply push the pipe spigot fully into the receiving socket, mark the spigot and withdraw 5mm / 10mm / 20mm as required prior to fixing the socket to the wall.
What are the dimensions of the Cascade 68mm downpipes offsets?
Please
click here for offset bend dimensions.
What other Gutter systems is Cascade compatible with?
Compatibility GuideHow to install the Cascade Gutttering Systems